Prep Time: 5 mins Cook Time: 25 mins
Total Time: 30 mins. Yields: 1 bag
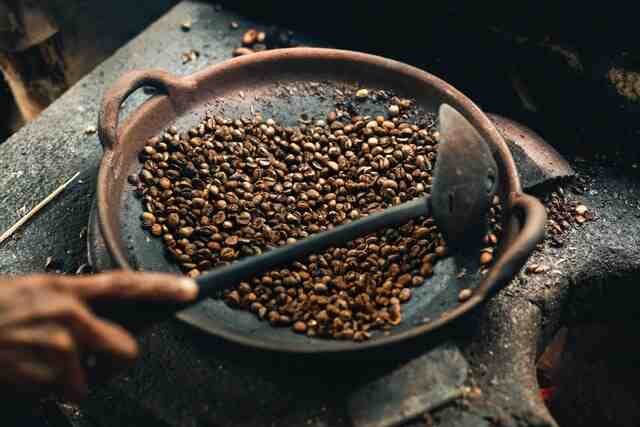
How to roast coffee beans at home? Roasting is what gives coffee beans their flavor. The color, the smell, the taste – everything would smell different without roasting even the finest coffee beans. And if you’re a coffee lover I suggest you try to make your own coffee from scratch. It’s an amazing process – a small miracle for our palate.
Coffee roasting stages and time guidelines in a nutshell
- Cinnamon Light Roast (6 minutes)
- Half City Light Roast (8 minutes)
- City+ Light Medium Roast (10 minutes)
- Full City Medium Roast (12 minutes)
- Full City+ Medium to Dark Roast (14 minutes))
- Vienna Dark Roast (16 minutes)
- French Dark Roast (18 minutes)
- Italian/Spanish Dark Roast (> 18 minutes)
How to Roast Green Coffee Beans At the Right Coffee Roasting Temperature?
Coffee enthusiasts often find themselves fascinated by the diverse appearance of green coffee beans. Each bean, at room temperature, dons a distinct color that hints at its origin and characteristics. South American green beans, for instance, exhibit a delicate pale green hue. In contrast, Indonesian beans are adorned with a richer, darker green, showcasing their uniqueness in the coffee world. Meanwhile, the African beans stand apart with a warm, inviting brown shade. These variations in color are a mere glimpse into the intricate world of coffee, where every bean tells a story of its own.
Achieving the perfect roast level may initially seem a little tricky, especially if you’re new to the art of coffee roasting. Despite all the details and tips available, you won’t learn the process unless you try it yourself. So, don’t be afraid to dive in, especially if you’re a fan of both medium and darker roasts. Along the way, you’ll discover the nuances of roasting that lead to your own unique coffee creations. In the end, the satisfaction derived from a cup of coffee crafted with your own hands is an unparalleled experience savoring the rewards in every sip.
- Heat the skillet to 350°F (176 °C). In a ventilated place, place your skillet on the stove/burner turning it on to reach 350 F. Use the laser thermometer to check the temperature of the skillet.
- Start the roast. Pour some green beans into the skillet, making sure that the skillet isn’t loaded more than necessary, and finally obtain an even roast. Recheck the temperature and you’ll find that you need to add some more heat to get back to 350F after a slight drop in temperature.
- Whisk without stopping. Once you pour the beans into the skillet you must begin whisking without stopping or otherwise, the roast won’t be even. Roast by following steps 4-11 stopping at the desired level of roasting.
Stage 1 – How to obtain a Cinnamon Roast?
What is the internal beans temperature? 385°F, 196 °C
What to look for? Expect beans to turn to yellow and continue to roast until the beginning of the first crack.
Description: This is the very first point in which you can say that coffee becomes “drinkable”. However, the coffee will taste rather grassy but still smell and look like coffee. This is not commonly used either at home or commercially.
- Roast up to the beginning of the first crack. Follow instructions 1-3 above. Then, expect the beans to get slightly yellowed. As you continue to whisk the coffee beans will change color and you’ll notice some smoke. Continue roasting your beans and whisking until you hear the first beans cracking. Congratulations, this is the beginning of the FIRST CRACK and you have obtained a LIGHT CINNAMON ROAST
Stage 2 – How to obtain a Half City Roast (Light Roast)?
What is the internal beans temperature? 400°F, 205 °C
What to look for? Expect beans to turn to light brown with no oil on the surface.
Taste: Toasted grain with pronounced acidity.
Caffeine: Expect a high level of caffeine.
Description: This light roast is also called the New England Roast. It is obtained in the middle of getting the first crack upon reaching an internal temperature of 400°F. At this stage, the coffee is much more “drinkable” with the coffee actually smelling like coffee and tasting slightly fruity with floral flavor notes. This roast is often used for a coffee-tasting technique called coffee cupping. With this technique and coffee roast, one can understand the coffee origin and check the difference between two coffees.
- Roast up to the middle of the first crack. Follow instructions 1-4 above. Continue to roast until the middle of the FIRST CRACK. This is called a HALF CITY ROAST.
Stage 3 – How to obtain a City + Light Medium Roast
What is the internal beans temperature? 405°F – 410°F, 207°C – 210°C
What to look for? Expect beans to turn to light – medium brown with no oil on the surface yet.
Taste: You can still taste the individual characteristics and origin of the coffee – very little taste of the roast.
Caffeine: Expect a high level of caffeine.
Description: This light to medium roast is obtained at the end of the first crack. There’s no oil on the beans just yet and you can still taste the individual characteristics and origin of the coffee – very little taste of the roast. This roast is commonly used for tasting and comparing coffee of the same region but from different estates. If there’s any acidity in the coffee then it can be recognized at this stage where acidity is well accentuated. The coffee would also start acquiring more body in the cup.
- Roast until the end of the first crack. Follow instructions 1-5 above. Continue to roast until the end of the FIRST CRACK and you will obtain a CITY + ROAST.
Stage 4 – How to obtain a Full City (Full Medium) Roast
What is the internal beans temperature? 410°F – 430°F, 210°C – 221°C
What to look for? The best at this stage is to check for the internal temperature but if you’re experienced then you can make sure to get the right roast level just by looking at the color.
Taste: The coffee with a medium roast has a smoother more balanced flavor than a light roast.
Caffeine: Expect a lower level of caffeine.
Description: We’re now at Full Medium Roast. Basically, we have reached the “first crack” and are roasted before the second crack occurs at around 430°F. The beans can have no oil or a few flecks of oil.
- Roast up until before the second crack. Follow instructions 1-6 above. Continue to roast making sure to stop before the second crack occurs at around 430°F to obtain a Full Medium Roast called Full City Roast.
Stage 5 – Full City + (Medium-Dark)
What is the internal beans temperature? 425°F – 435°F, 218°C – 224°C
What to look for? The second crack. The beans may also have flecks of oil.
Taste: The coffee has balance between the original flavor and the roast
Caffeine: Expect a lower level of caffeine.
Description: This occurs during the 2nd crack. Basically, it’s past the Full City but cannot be called a Vienna Roast yet. Just like the Full Medium, the beans can have some flecks of oil and a balance between the original flavor and the roast. This roast is also associated with a little more body and less acidity than a Full City Roast.
- Roast up until the second crack. Follow instructions 1-7 above. Continue to roast making sure to stop at the second crack that occurs at around 430°F to obtain a Full City + Medium to Dark Roast.
Stage 6 – Vienna Roast (Dark)
What is the internal beans temperature? 430°F – 440°F, 221°C – 227°C
What to look for? Look for oil on the beans. The color of the beans at this stage should be dark brown.
Taste: Heavy, full-body flavor with a small taste of spice. Coffee beans are also characterized by less acidity.
Caffeine: Low level of caffeine.
Description: In this phase, the beans reach an internal temperature of 430°F – 440°F happening during the second crack. The temperature here is high enough to show oil on the beans’ surface. More smoke will appear and now the taste will have more flavor of the roast than of the original flavor. The aroma here is richer and full of body and flavor. They are also characterized by less acidity.
- Roast past the second crack. Follow instructions 1-8 above. Continue to roast after the second crack expecting a dark brown color and oil on the surface. Stop when the temperature reaches a maximum of 440°F to obtain a Vienna Dark Roast.
Stage 7 – French Roast (Dark Roast)
What is the internal beans temperature? 440°F – 455°F, 227°C – 235°C
What to look for? Look for oil on the beans. The color of the beans becomes black at this stage.
Taste: Bitter, smoky, or burnt taste
Caffeine: Low level of caffeine.
Description: These roasts go to the end of the second crack until they reach an internal temperature of 455°F. At this point, the beans are covered in oil and the roast will be covered with smoke. The color of the beans will start turning from brown to greyish-black. Practically the coffee here will have none of the original flavor here with the taste of roast being predominant. Any coffee turned to French Roast tastes practically the same with an undertone of burnt taste and now the coffee will be thinner, with very little acidity left.
- Roast until black. Follow instructions 1-9 above. Continue to roast expecting it to turn black or very dark in color. Stop when the temperature reaches a maximum of 455°F to obtain a Vienna Dark Roast.
Stage 8 – Italian / Spanish Roast
What is the internal beans temperature? 455°F -475°F, 235°C – 255°C
What to look for? Practically this is like a charcoal roast.
Taste: Bitter, smoky, or burnt taste. Surprisingly it might still taste better than store-bought coffees.
Caffeine: Low level of caffeine.
- Roast over 455 °F. Follow instructions 1-10 above. Continue to roast after the second crack expecting a dark brown color and oil on the surface. Stop when the temperature reaches a maximum of 455°F to obtain an Italian/Spanish Roast.
Tips to avoid common roasting mistakes
Roasting coffee beans at home is a rewarding and customizable experience, but it also comes with potential pitfalls. Common roasting errors can lead to undesirable flavors and inconsistency in your coffee. However, with some knowledge and careful attention, you can avoid these pitfalls and achieve a more satisfying roast.
- Under-Roasting:
- Error: Under-roasted beans will have a grassy and raw taste, lacking the depth and complexity of a well-roasted coffee.
- Solution: To avoid under-roasting, make sure to roast your beans for an adequate duration. Pay attention to the first and second crack (if applicable) and ensure the beans reach the desired roast level.
- Over-Roasting:
- Error: Over-roasting results in burnt or bitter-tasting coffee. The beans can become oily and lose their unique flavor characteristics.
- Solution: Carefully monitor the roast process and stop when the beans reach the desired roast level. Experiment with roast times and temperatures to find the sweet spot for your taste preferences.
- Inconsistent Roasting:
- Error: Inconsistent roasting can lead to a mix of over-roasted and under-roasted beans in the same batch.
- Solution: Stir the beans during the roasting process to ensure even heat distribution. Invest in a high-quality coffee roaster with even heat distribution capabilities for more consistent results.
- Ignoring First and Second Cracks:
- Error: The first and second cracks are critical auditory cues during roasting. Ignoring them can result in over-roasting or under-roasting.
- Solution: Pay close attention to the first crack (a series of rapid, popping sounds) and second crack (if applicable). Adjust your roast accordingly, and record your observations for future reference.
- Inadequate Cooling:
- Error: Neglecting the cooling process can lead to beans continuing to roast even after they are removed from the heat source.
- Solution: Transfer the roasted beans to a cooling tray or use a dedicated cooling setup. Fan cooling, stirring, and exposing the beans to room-temperature air will quickly cool them down and stop the roasting process.
- Roasting Too Many Beans at Once:
- Error: Overloading your roaster with too many beans can lead to uneven roasting and inconsistent results.
- Solution: Follow the manufacturer’s recommendations for batch size or use a smaller batch to ensure even roasting. Smaller batches are easier to control.
- Neglecting Bean Quality:
- Error: The quality of the green coffee beans you start with greatly affects the final roast. Using low-quality beans can result in a disappointing roast.
- Solution: Choose high-quality, freshly harvested green coffee beans from reputable sources. Pay attention to the beans’ origin and processing methods, as these factors influence the roast.
- Inaccurate Temperature Control:
- Error: Inconsistent or inaccurate temperature control can lead to inconsistent roasting.
- Solution: Invest in a coffee roaster with precise temperature controls. Monitor and adjust the temperature as needed throughout the roasting process to maintain consistency.
- Skipping Preheating:
- Error: Starting the roast without preheating the roaster can result in uneven roasting and extended roast times.
- Solution: Always preheat your roaster to the desired temperature before adding the beans. This ensures a stable and consistent roasting environment.
- Neglecting Record Keeping:
- Error: Failing to keep records of your roasting experiments can hinder your ability to replicate successful roasts.
- Solution: Maintain a roasting log that includes details such as roast times, temperatures, batch sizes, and tasting notes. This record will help you refine your roasting process over time.
Experimentation and practice are key to mastering the art of roasting, so don’t be discouraged by initial mistakes; they are valuable learning experiences on your journey to becoming a coffee roasting connoisseur.
Storing the coffee
Storing coffee beans, whether they are green or roasted, is crucial for preserving their freshness and flavor. Coffee is a sensitive product, and exposure to air, light, moisture, and odors can lead to rapid deterioration in taste and aroma. To maintain the quality of your coffee beans, it’s essential to store them properly.
How to Store Green Coffee Beans:
Green coffee beans are unroasted and less sensitive than roasted beans, but they still require proper storage to maintain their quality.
- Airtight Container: Just like roasted beans, it’s essential to store green coffee beans in an airtight container. Plastic or glass containers with airtight seals work well. Make sure to press out any excess air before sealing the container.
- Cool, Dark Place: Store green beans in a cool, dark location, away from direct sunlight or extreme temperature fluctuations. The ideal temperature is around 50-70°F (10-24°C).
- Avoid Moisture: Ensure that your storage area is dry, as excessive moisture can lead to mold or spoilage. Avoid storing green beans in humid environments.
- Minimal Handling: Limit handling of green beans to reduce exposure to oxygen. Keep them in their original packaging or transfer them to an airtight container upon arrival.
How to Store Roasted Coffee Beans:
Roasted coffee beans are more delicate and susceptible to rapid flavor degradation. When you are happy with the level of your roast and hence the color and oil of the beans, remove the skillet from the heat. Then follow these instructions:
- Drop the beans. Gently place your beans in a bowl. Drop the beans from a height so that the chaff is lost in the air. You can do this by dropping the beans from the bowl into a sieve placed 20-30 cm below.
- Grind the beans. Now the beans are ready to grind.
- Store in Airtight Container: The key to storing roasted beans is using a truly airtight container. Mason jars, vacuum-sealed bags, or specialty coffee storage containers work well. Push out excess air, ensuring a tight seal.
- Keep in the Cool and Dark: Roasted beans should be stored in a cool, dark place. A temperature of around 50-70°F (10-24°C) is ideal. Avoid the freezer or refrigerator, as these can introduce moisture and odors.
- Avoid Frequent Opening: Limit opening the container to reduce exposure to air. When you do open it, work quickly, and reseal the container promptly.
- Consume Quickly: Roasted coffee beans have a limited shelf life. For the freshest taste, try to consume them within 2-4 weeks of the roast date.
Home Coffee Roasters & Alternatives
In the previous sections, we have already shown you that you can roast your coffee beans using a skillet making it a perfect choice if you don’t want to spend any money.
However, if you wish to invest in a home coffee roaster, both drum and air coffee roasters will make this process easier. the choice between a drum coffee roaster and an air coffee roaster ultimately depends on your preferences and requirements. Drum roasters offer precise control and even roasting, making them ideal for those who want to fine-tune their roasting skills. On the other hand, air roasters are known for their efficiency, compact size, and user-friendliness, making them a great choice for beginners or those with limited space. Both types of roasters can provide you with the joy of roasting your own coffee beans and enjoying a fresh, customized cup of coffee at home.
Alternatively, you might also consider roasting your coffee beans using the oven or airfryer.
Drum Home Coffee Roasters
Drum coffee roasters are a popular choice among coffee enthusiasts who prefer to roast their beans at home. These roasters typically consist of a cylindrical drum with a heating system located at the bottom. The drum is designed to rotate during the roasting process, ensuring an even and consistent roast for the green coffee beans placed inside.
Key Features:
- Even Roasting: One of the primary advantages of drum roasters is their ability to provide even roasting. As the drum rotates, it agitates the coffee beans, preventing hot spots and ensuring that all beans receive uniform heat. This results in a well-balanced flavor profile in roasted coffee.
- Capacity: Drum roasters come in various sizes, catering to the needs of both small-scale and larger-scale home roasting.
- Roasting Control: Many drum roasters offer precise control over roasting temperature and time, allowing you to experiment and fine-tune your roasting process. This level of control is essential for achieving the specific roast levels you desire.
- Smoke Management: Drum roasters often come equipped with effective smoke management systems, including vents and filters. This ensures that your home remains relatively smoke-free during the roasting process.
- Cooling Mechanism: After roasting, the beans need to cool quickly to prevent over-roasting. Drum roasters typically have a cooling mechanism that rapidly lowers the temperature of the beans, locking in their flavors.
Air / Convection Coffee Roasters
Air coffee roasters, also known as convection coffee roasters, operate on a different principle compared to drum roasters. They are designed to roast coffee beans using a flow of hot air. These roasters are gaining popularity among home roasters for their efficiency and ease of use.
Key Features:
- Hot Air Roasting: Air roasters work by blowing hot air directly onto the coffee beans, ensuring an even roast. The beans are suspended in the hot air stream, and this method allows for precise control over the roast.
- Uniform Roast: With the even distribution of hot air, air roasters provide consistent results. The beans are constantly in motion, preventing any risk of scorching or uneven roasting.
- Compact Size: Air roasters are often more compact and lightweight than drum roasters, making them suitable for smaller kitchens and spaces. They are a great choice for coffee enthusiasts with limited room.
- Roasting Speed: Air roasters tend to roast coffee beans more quickly compared to drum roasters. This can be advantageous for those who prefer a shorter roasting time.
- Ease of Use: Air roasters are generally user-friendly, making them an excellent choice for beginners. They often come with preset roast profiles and temperature controls that simplify the roasting process.
- Smoke Management: While air roasters produce less smoke than drum roasters, they may still generate some smoke during the roasting process. It’s important to consider proper ventilation or a smoke elimination system when using an air roaster.
Roast Coffee Beans using Airfyer or Oven
Steps:
- Preheat your air fryer/oven to the highest temperature setting available, typically around 400-450°F (200-230°C).
- Spread your green coffee beans evenly in a single layer on a mesh or perforated basket or tray. This allows for even roasting and good air circulation.
- Place the basket or tray with the beans into the preheated air fryer.
- Roast the beans at the highest temperature setting, and begin timing the roast.
- Pay close attention to the beans and be ready to stop the air fryer when you achieve your desired roast level.
- The first crack will typically occur around 5-7 minutes into the roast.
- Continue roasting for a lighter or darker roast, as per your preference, for a total roast time of 10-15 minutes.
- Once roasted to your liking, immediately remove the beans from the air fryer to cool.
How To Roast Coffee Beans
Ingredients
- 1 bag Green Coffee Beans unroasted
Instructions
- Start the roast. Pour some green beans into the skillet, making sure that the skillet isn’t loaded more than necessary, and finally obtain an even roast. Recheck the temperature and you’ll find that you need to add some more heat to get back to 350F after a slight drop in temperature.
- Whisk without stopping. Once you pour the beans into the skillet you must begin whisking without stopping or otherwise, the roast won’t be even. Roast by following stages 1-8 stopping at the desired level of roasting.
- Heat the skillet to 350°F (176 °C). In a ventilated place, place your skillet on the stove/burner turning it on to reach 350 F. Use the laser thermometer to check the temperature of the skillet.
- Stage 1 - To obtain a Cinnamon Roast
- Roast up to the beginning of the first crack. Follow instructions 1-3 above. Then, expect the beans to get slightly yellowed. As you continue to whisk the coffee beans will change color and you’ll notice some smoke. Continue roasting your beans and whisking until you hear the first beans cracking. Congratulations, this is the beginning of the FIRST CRACK and you have obtained a LIGHT CINNAMON ROAST
- Stage 2 - To obtain a Half City Roast
- Roast up to the middle of the first crack. Follow instructions 1-3 and Stage 1 above. Continue to roast until the middle of the FIRST CRACK. This is called a HALF CITY ROAST.
Stage 3 - To obtain a City + Light Medium Roast
- Roast until the end of the first crack. Follow instructions 1-3 and up to Stage 2 above. Continue to roast until the end of the FIRST CRACK and you will obtain a CITY + ROAST.
Stage 4 - To obtain a Full City (Full Medium) Roast
- Roast up until before the second crack. Follow instructions 1-3 and up to Stage 3 above. Continue to roast making sure to stop before the second crack occurs at around 430°F to obtain a Full Medium Roast called Full City Roast.
- Stage 5 - Full City + (Medium-Dark)
- Roast up until the second crack. Follow instructions 1-3 and up to Stage 4 above. Continue to roast making sure to stop at the second crack that occurs at around 430°F to obtain a Full City + Medium to Dark Roast.
- Stage 6 - Vienna Roast (Dark)
- Roast past the second crack. Follow instructions 1-3 and up to Stage 5 above. Continue to roast after the second crack expecting a dark brown color and oil on the surface. Stop when the temperature reaches a maximum of 440°F to obtain a Vienna Dark Roast.
- Stage 7 - French Roast (Dark Roast)
- Roast until black. Follow instructions 1-3 and up to Stage 6 above. Continue to roast expecting it to turn black or very dark in color. Stop when the temperature reaches a maximum of 455°F to obtain a Vienna Dark Roast.
- Stage 8 - Italian / Spanish Roast
- Roast over 455 °F. Follow instructions 1-3 and up to Stage 7 above. Continue to roast after the second crack expecting a dark brown color and oil on the surface. Stop when the temperature reaches a maximum of 455°F to obtain an Italian/Spanish Roast.
Storing the coffee
- When you are happy with the level of your roast and hence the color and oil of the beans, remove the skillet from the heat. Then gently place your beans in a bowl.
- Now, it's important to drop the beans from a height so that the chaff is lost in the air. You can do this by dropping the beans from the bowl into a sieve placed 20-30 cm below.
- Now the beans are ready to grind. Store in an airtight container.
At Koffeecito you will get exactly what you see. The reasons we started this coffee bean movement was to express our desires to spread the joy of a cup of coffee as new parents to share with those alike. We value a persons time and ambitions. We are dedicated to bringing you the highest quality coffee available.